
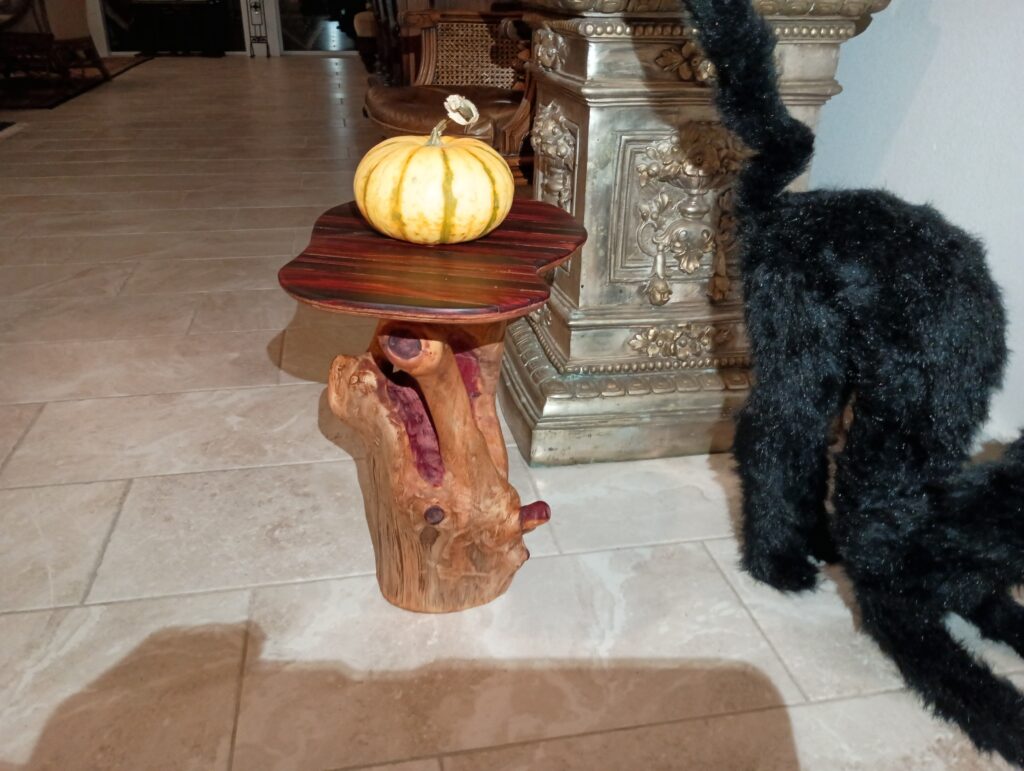
This October, someone showed me an image of a table they were interested in. It was a small table comprised of a very unique, gnarly shaped piece of lumber and natural cookie top. It was a fine looking little table but made from a rare and highly unique piece of wood. The top was clearly a solid cut of a log (cookie), but nicely refined and finished.
I told him that such pieces were rare and not easily purchased. He told me to do my best. So I did, with context, time and costs considered. No, not quite my best. I can only spend so much time and supplies on budget projects. But I did have a 4′ solid cedar log to start with, and lots of scraps too. And from it came a cedar log table.
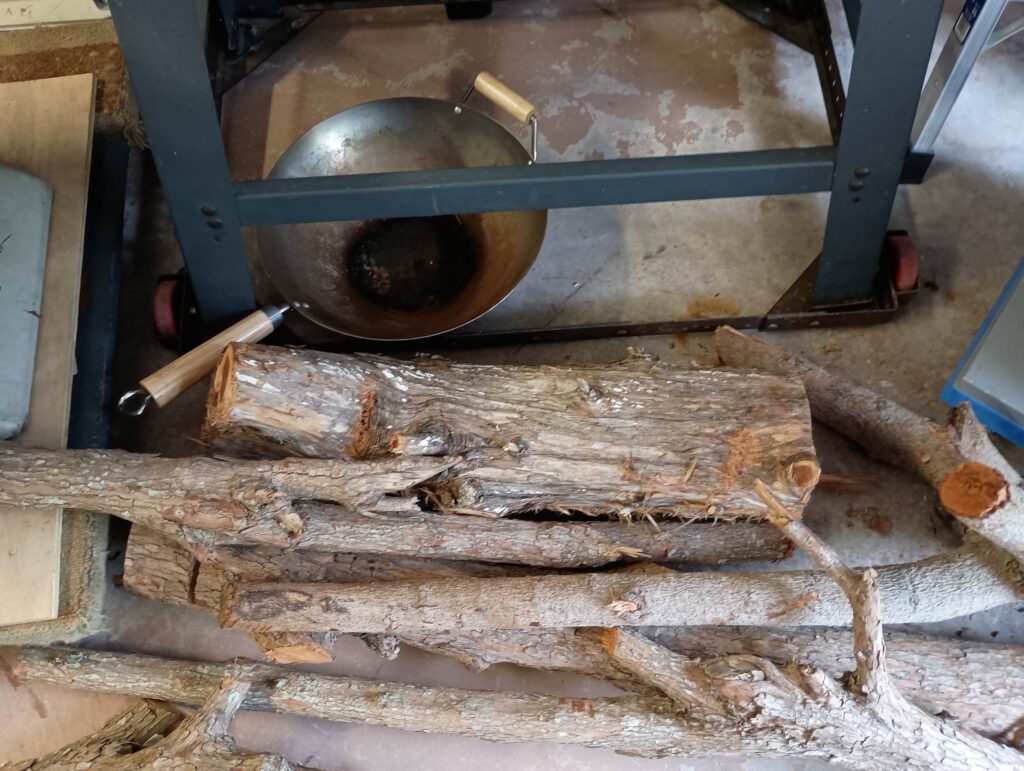
The solid log above is the other half of the previously 4′ one. I took its sibling outside and began wrangling it into shape. I would have been happy to use a chainsaw, but noise regulations precluded that option. So I began attacking it with a die-grinder, then drilling through it in various areas, followed by some back-and-forth with the grinder.

I continued hacking away, while attempting to artificially imply broken limbs and signs of aesthetic decay. At the ends of the extremities that were now forming, I gently hollowed out the faces, giving it a convincing broken limb appearance.
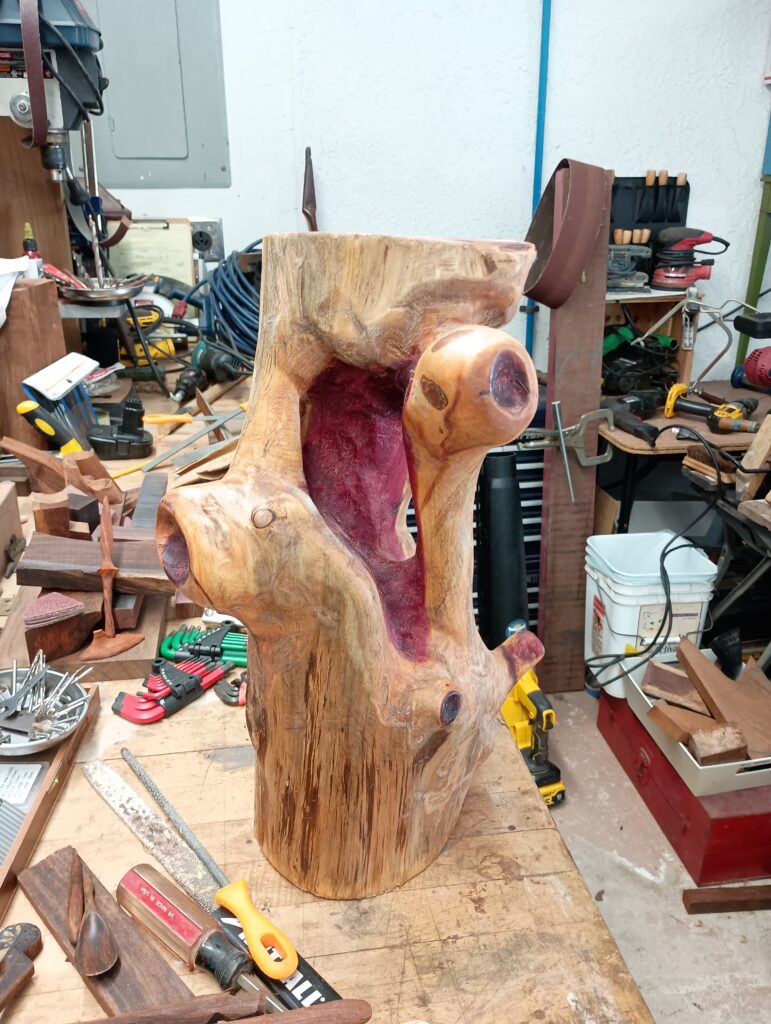
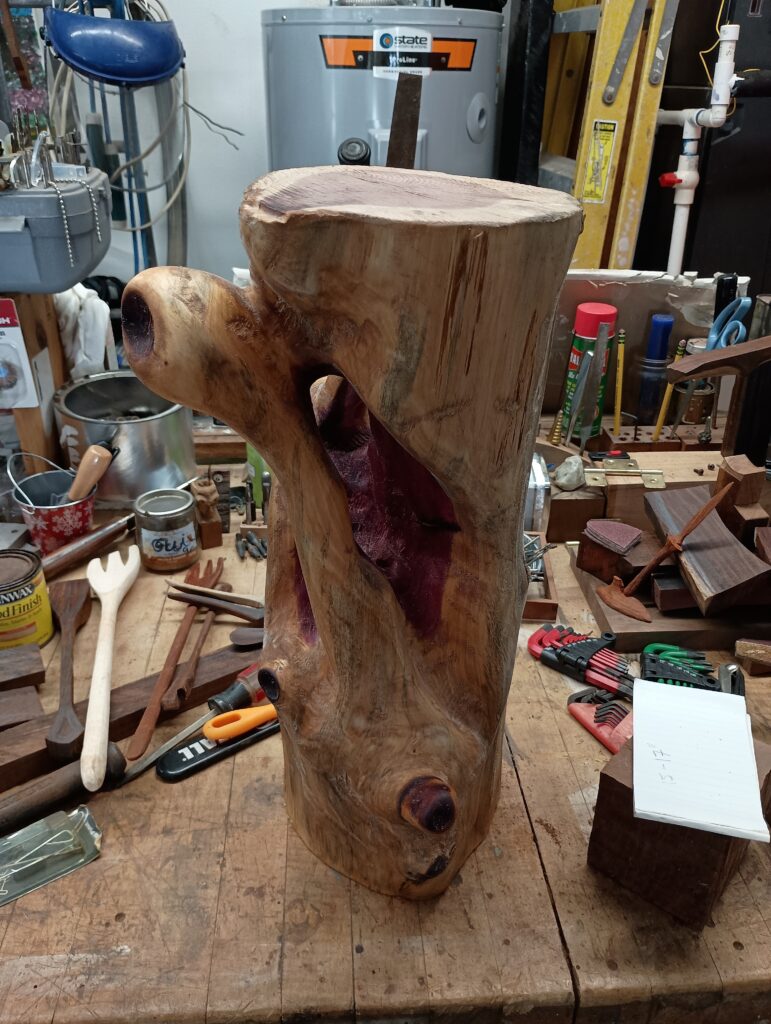
Above is cedar log table in the almost-ready state. I still had to onerously smooth out the inner portions which proved quite tedious, but eventually worked out well. At this point I began applying stains and oils to get an idea of what to expect.
After a bit of this and a bit of that, I labeled it dun. I then proceeded to craft the table top, which I failed to document, therefore an explanation must suffice. I have several old wine boxes with sturdy, natural plywood lids. I used one of these as the base for the thin cocobolo strips I would eventually glue on top. I spent sometimes ripping a bundle of thin cocobolo strips, which I then laid out on top, then eventually glued and weighted down with a 100lb dumbbell and sheet of plywood.
However, I had to figure out something to do about the rough edges. Already having spent a fair amount of time, effort and resources on the project, I got a bit lazy. But creativity and cleverness can aid in such a situation. After band sawing the finished top into the desired shape, I got the trusty rasp and beveled the edges. On the bottom plywood portion, I beveled aggressively, tapering it enough to effectively hide it by blending it…away. Primitive, but that’s what the table suggests. The cocobolo top is a bit awkward, and admittedly not the epitome of harmony, but I was satisfied and so was he.
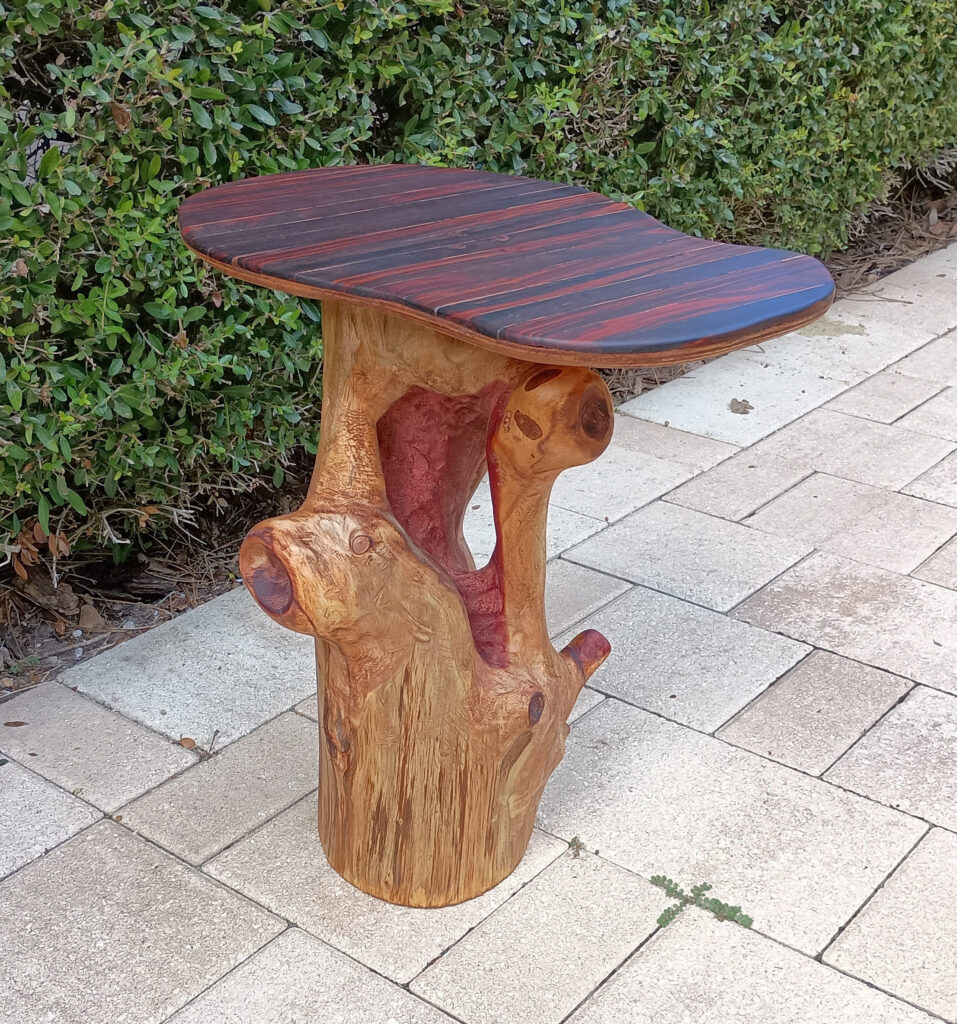
Securing and leveling the cocobolo top was mildly tricky for me, having never done such a project. But I wangled it through the compromise of screws and wedges. The screws were my one regret, but I had to finish it and draw a line somewhere. Having began as a solid log, with no irregularities, no holes or limbs, I think it turned out quite convincing and I hope, useful in an way unoffensive, or even pleasing to the eyes. I also managed to finish it on Halloween!